Revisiting my SH847 regulator/rectifier mount.

I mounted mine with the bracket I made. It sets nicely behind the side cover and I actually added some small additional heat sinks to the back of mine. I check it after riding for a couple hours on a hot day. It was way too hot to handle so it gets pretty warm. It probably is within the temperature dissipation the device can handle, but personally I would be reluctant to put it in the filter box. This is especially true if you have plugged the large snorkel opening. I can't imagine any significant air flow in the box as it is no longer pulling fresh air from under the seat.

I actually considered adding a small 12 volt computer case fan (which I bought) to the back of the heat sinks. I could easily run it off my Amplink power controller. I just haven't gotten around to it.

Just my opinion on the matter after having felt it while in use.
That is pretty much my view. I must stick a thermocouple in that box. Well once I have a clutch.
 
Add me to the list of impressed people for Bedifferent's mounting bracket for the SH847 mounting bracket. Very well done, and very solid. He gives excellent directions on how to mount everything together.

Regarding the vacuum hoses for the canister which has to come out, I made a modification to Idaho Red Rocket 3's note in another thread:

Nice work Bob. When I took my canister off I rerouted the hose to the canister back on the TB so it just goes from one TB to another.

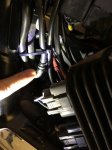
In this thread, DEcosse gave an illustration of the hoses as they relate to the throttle bodies and the canister. I have all of the stock intake and did not want to go through the trouble of taking it all off to access the throttle bodies. In looking at DEcosse's illustration and Idaho Red Rocket 3's comment, I realized that if I connected the end of Pipe B which goes into the Purge Control Valve to the end of Pipe C where it goes into the canister, I would accomplish the same thing Idaho Red Rocket 3 did. I cut off the nipple on the Purge Control Valve onto which Pipe B is attached. I cut off the excess hose on Pipe B and Pipe C so there is not a lot flopping around in the space. In cutting Pipe C, I discovered that the ID of the hose is just a little smaller than that of Pipe B. I was able to press the end of each hose over each end of the nipple. They were very tight. I then used small zip ties to make sure they stayed on, and then used another zip tied to keep it pulled toward the new fuel line I ran from the overflow valve down to the underside of the bike. I have the Jack-Be_Quick bracket attached and the overflow hose came out just behind it.

In the photo below, just above and to the right of my finger, you can see the two hoses connected together with zip ties making sure they stay attached to the nipple from the Purge Control valve. The hoses above my finger, the one on the left is Pipe B, the second from the left is the new fuel line running from the overflow valve which can just be seen at the end of that hose, and the third from the left is Pipe C. The zip tie above my finger is to keep the hoses away from the SH847.

Vacuum Hoses.jpg

Started the bike and everything worked without throwing a code. Very pleased. Thank you all for this wonderful information.
 
Thanks @PaddyO . If I had access to the proper tools they would not only be practical, but a thing of beauty as well. Did I say... I miss my machine shop.

Wow, Bedifferent! If this is what you can make without “proper” tools, I can only imagine what you could do with “proper” tools. You are quite the artist! You are too modest!
 
I am revisiting the SH847AA series regulator/rectifier mount that I made. I posted some information elsewhere in the forum, but I have revised some things.

I have fabricated several jigs and fixtures that will allow me to duplicate the mount I made. It will fasten the new R/R securely behind the left infill panel. I fits my 2015 R3T ABS nicely, utilizing a screw located on the air box and the frame for mounting. If your relay bracket, screw and frame match my pictures, it should work if you are interested.

I decided to modify the backing plate I used and not include the ears (as shown in one of the pictures). This helps save time using a my band saw to cut the backing plates. I made up a set of instructions as well to help keep the install simple. FYI...I did not bother to remove the stock R/R as...what is the point. I chose to rather to just cap of the connectors. A big thanks to @DEcosse for putting me on to the right connectors to use.

I am not pushing a product here, but trying to help out with a mount you can use if you can't make your own. I will be just as happy if I don't make any more, but at least I can if needed.

Now for the down side. I will not spend time and money making them for super cheap. When I factor in wear and tear... sanding belts, blades, materials, driving around to get the material, nuts, bolts, and my labor making all the parts, I have come to the conclusion I will not make and ship them for less than $35. $7.20 of which is just for shipping.

If you can't make a good mount for your new $155.00 R/R, this is a ready made solution. Feel free to copy and make your own if you like. This mount is rock solid.

Pictured:

The mount with all the included parts (I have a couple made with the ears on them), my jigs and fixtures for making them, the mounted R/R, the capped stock regulator, the airbox mounting bracket screw and relay bracket on my bike, old and newer mounting plate and the mounted SH847AA.
Bedifferent can I buy one from you?
 
My review: The bracket fit very nicely and was an easy install. It came with good instructions and I'm very pleased with the results. Thanks much for this fine work Bedifferent!
 
Just did this on my bike 2015 Roadster. I had to cut off the part of the relay bracket that extends past the second bolt mount to the right when you face the bike. Removed the stock R&R and used a 1 and a half inch wide Aluminum strip (Ace Hardware) cut to length and drilled holes for R&R and attached it with countersunk metal screws for a lower profile on the back end and mounted the strip the the battery box mounting bolt and the lower end zip tied through a slot we cut on the Aluminum strip and through one of the mounting bolt holes of the old R&R.
 
Back
Top