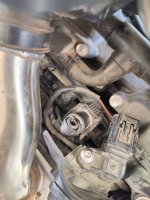
Air Filter Change

Great job buddy. That is the kind of team spirit we need to help each other. Much appreciated!!!!
OK! Job, done, about 3 hours for me. First off, great video, I had to check it a few times during the project. Here’s a few pointers for anyone about to tackle this job:

1) As noted, just flip up the TFT, then remove the two tank bolts, and lift the tank, preferably as high as you can get it, then prop up with some foam or something that won’t scratch the tank.

2) Once you have disassembled and have access to the filter housing, per the video, the hardest part IMHO is a) getting the filter assembly out, then, b) (much harder until I figured it out!!) is getting the new filter / assembly back in. The assembly has 4 clips along the back that fit to the frame runner that holds the assembly tight to the air box. To remove, you have to sort of push back a bit, while pulling down, so as to free the clips from the frame. Once that’s accomplished, you kind of just wiggle it out, reason being is that you have the 3 rubber intake necks that tend to get hung up as you are removing, or at least that was my experience.

3) So for the re-assembly….this is where my garage was filled every foul word known and a few new ones……first, I simply put the new filter in the housing and tried for re-install. This turned out to be a really bad idea, first because I nearly wrecked the new filter on the mounting bolts, and second because I could not find the right technique to get the back clips attached. Maybe obvious but very important…don’t be fooled into thinking you have it and just re-install the mounting nuts and call it good. If those clips at the back don’t seat, then you have no seal to the airbox and thus basically no filter.

What I then did was just set the filter aside, and try the housing by itself, just to get a feel for what’s hanging up and how it should go in. There is an electrical connection near the front of the tank which may have been part of my problem, pushing this and the hoses aside helped, and it went right in. Then I thought, OK, how about I check the fit of the filter to the airbox, by itself, just to be sure that wasn’t the problem….it wasn’t, the new filter fits just fine. And then, AH HA! You guessed it….filter first, hold it in place (a little tricky), then the housing, back side clips slid right into place, then just line up the housing front to the mounting bolts, all down hill from there!

4) One other tip…when re-assembling the intake runners to the throttle body housing, beware of cross-threading the mounting bolts. The TB housing is aluminum and its really easy to cross thread. Note that there are 4 cap screws, then on the two ends, bolts which hold the cover in place. All 6 hold the intake tight on the TB housing gasket. A suggestion is to make sure you can correctly thread all 6, then tighten the inner 4, remove the outer 2, install the cover, then install the outer 2.

Filter done, pipes done, now for the tune 😎
 
Just did mine. You don’t need to remove the flyscreen/gauges/tank as the service manual states. Everything is pretty straight forward until you get to removing the hinged air filter tray. Instructions don’t tell you how it’s connected to the airbox rail. Not a ton of room to maneuver it into position. Took a fair bit of cursing and stepping away until I could go about it logically. Working on a diagram to help explain how it slots in. I also recorded the overall process I took and will be putting a video together this week.
You have a service manual? Where do I get one?
 
I was lifting the front of my tank to change my air filter and the little bit I moved it caused the fuel feed plug thing to break off inside of the fuel hose. Anyone know where I can get just the fuel feed and not have to buy anything else? Picture attached. Thing snapped like it was dry rotted. There was still several inches of the hose available, so there was no real pressure on it at all. Ended up having to remove the tank after this to see what the hell happened. The fuel harness is a ***** to get unsnapped btw.
 

Attachments

  • IMG20230509125317.jpg
    IMG20230509125317.jpg
    153.5 KB · Views: 86
I was lifting the front of my tank to change my air filter and the little bit I moved it caused the fuel feed plug thing to break off inside of the fuel hose. Anyone know where I can get just the fuel feed and not have to buy anything else? Picture attached. Thing snapped like it was dry rotted. There was still several inches of the hose available, so there was no real pressure on it at all. Ended up having to remove the tank after this to see what the hell happened. The fuel harness is a ***** to get unsnapped btw.
Aww shoot! This was predicted by some. Similar to other Triumph models, similar issue.
For something designed to be removed, more than a few times throughout the life of the bike, you would like to believe that it would be a little more robust.
 
I was lifting the front of my tank to change my air filter and the little bit I moved it caused the fuel feed plug thing to break off inside of the fuel hose. Anyone know where I can get just the fuel feed and not have to buy anything else? Picture attached. Thing snapped like it was dry rotted. There was still several inches of the hose available, so there was no real pressure on it at all. Ended up having to remove the tank after this to see what the hell happened. The fuel harness is a ***** to get unsnapped btw.
yep...done that..lol...it comes complete with the hose and banjo fitting connecting to the tank...they dont sell them seperate...part #14...youll find it on 'Triumph Bike Parts' web page...https://www.bike-parts-triumph.com/
FUEL-PUMP-Triumph-MOTO-Rocket-III-Rocket-3-ROCKET-3-GT-ROCKET-3-GT-10011022437.jpg
 
Last edited:
yep...done that..lol...it comes complete with the hose and banjo fitting connecting to the tank...they dont sell them seperate...part #14...youll find it on 'Triumph Bike Parts' web page...https://www.bike-parts-triumph.com/
FUEL-PUMP-Triumph-MOTO-Rocket-III-Rocket-3-ROCKET-3-GT-ROCKET-3-GT-10011022437.jpg
Yea I've already bought the part from a dealership in Missouri, hopefully it arrives soon.
 
Seems like something worth having a spare. Going to order mine today with a few other defective bits that have failed. I'm thinking a CAD program designed this bike. Surely a human wouldn't make something so unforgiving to work on. Besides using the cheapest Chinese parts they could source. They can get the look but the quality of materials is subpar.
 
I fixed it after the part arrived. The stupid North American requirement for the 2nd battery disconnect switch is in the way of easily removing the fuel line disconnect so it's ****ing painful to do. The DNA air filter definitely made the bike louder. After letting it idle for about 10 minutes, everything seems to have shaken out okay, so far.

I gotta say whoever designed the air filtration and secondary air tube this way needs a swift kick in the balls. You need tiny hands to access anything in any efficient way.
 
Back
Top