
Chip
Turbocharged
- Joined
- Oct 13, 2014
- Messages
- 745
- Location
- Vicksburg Michigan
- Ride
- 08 Rocket Touring, 15 Rocket Touring
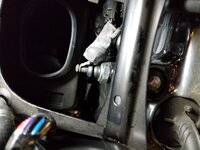
Was thinking along your line of reasoning. Why go thru all the dinking around to save a few bucks on the sensor. Just finding a way to work in the space allowed is a pain in the a—. I’m heading down to my shop now. Got a few small honey-do’s for Jamie then I can putz around on the sensor. Thanks you guys....
")