mstraub72
.040 Over
- Joined
- Sep 5, 2017
- Messages
- 82
- Location
- Leduc, Alberta, Canada
- Ride
- 2015 Triumph Rocket 3 Roadster ABS, Black & Red
Afternoon all!
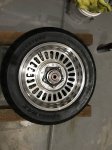
I received my new Avon Cobra rear tire yesterday, and the shop surprisingly got it installed on the rim for me in around an hour. I promised a follow-up video to my previous one documenting the entire removal process, so I took last night to film the entire installation of the rear wheel, and just finished getting it all trimmed up and uploaded to YouTube.
Couple shout-outs. @Gregger , I mentioned your wicked suggestion at the 25 minute mark...leaving the muffler mount bracket installed on the mufflers themselves was FANTASTIC. Sure was easy to put them back on, vs screwing around trying to line up with those little movable nuts inside the muffler standoffs! Great idea.
And although my Dad isn't on the forum, being afflicted with Stage 3 Harleyitis, that faux - Flipmeister stand he made me to straddle across those lift holes...fantastic. So stable, and so much weight off the oilpan.
And one last thing now that the whole task is pretty fresh in my head. There's only really one point where you really need either (a) another person, or (b) a long breaker bar that reaches the ground comfortably. The rest of the entire job can be done solo. When you're going to torque up the axle bolt to 110nM, you either have to rest a long breaker bar and the 14mm hex head socket on the left side of the bike (which will resist your torque wrench on the other side, pulling up on the axle nut), or you have a friend sitting opposite you holding something to resist your torque wrench rotation.
Lastly, some quick thoughts on all the tools I can remember requiring:
Original thread with Removal video and all associated conversation:
Rear wheel removal video walkthrough
I received my new Avon Cobra rear tire yesterday, and the shop surprisingly got it installed on the rim for me in around an hour. I promised a follow-up video to my previous one documenting the entire removal process, so I took last night to film the entire installation of the rear wheel, and just finished getting it all trimmed up and uploaded to YouTube.
Couple shout-outs. @Gregger , I mentioned your wicked suggestion at the 25 minute mark...leaving the muffler mount bracket installed on the mufflers themselves was FANTASTIC. Sure was easy to put them back on, vs screwing around trying to line up with those little movable nuts inside the muffler standoffs! Great idea.
And although my Dad isn't on the forum, being afflicted with Stage 3 Harleyitis, that faux - Flipmeister stand he made me to straddle across those lift holes...fantastic. So stable, and so much weight off the oilpan.
And one last thing now that the whole task is pretty fresh in my head. There's only really one point where you really need either (a) another person, or (b) a long breaker bar that reaches the ground comfortably. The rest of the entire job can be done solo. When you're going to torque up the axle bolt to 110nM, you either have to rest a long breaker bar and the 14mm hex head socket on the left side of the bike (which will resist your torque wrench on the other side, pulling up on the axle nut), or you have a friend sitting opposite you holding something to resist your torque wrench rotation.
Lastly, some quick thoughts on all the tools I can remember requiring:
- Torque wrench (likely two, smaller 3/8" drive with lower range, and larger 1/2" one that goes up to at least 110nM, the highest torque we hit on this job)
- Scissor jack
- Standard hydraulic jack...larger 3 ton one with a larger lifting disc / surface holds the wheel a little better than those tiny base model ones, but they'll work fine too, just be really careful the wheel doesn't roll while airborne.
- Flipmeister stand or fab up one like I made (some people just jack straight up on the oil pan...your call...scares me too much)
- 4 ratchet straps, 2 to hold handle bars straight (especially needed if you're doing front wheel too), and 2 to cross over bike down to jack stand to counteract any tipping issues)
- 5mm allen key
- 12mm socket
- 14mm socket
- 24mm socket
- 14mm hex head socket
- T30 Torx socket
- 12mm wrench
- lacquer thinner or other suitable degreaser for brake discs and messy parts
- binder twine / steel wire to tie brake caliper ass'y up and out of the way
- Moly 77 lube or whatever grease book recommends for the bevel box to rear wheel mating gears
- WD-40 for a quick spray onto the exhaust pipe mating surface to make it easier to slide it back on
- Rags to clean off gears with lacquer thinner
- Something to brush the old thread locker off the removed bolts and axle. I used a simple wire brush wheel in my drill. A bench grinder / wire wheel combo unit would rule to really get them clean.
- New blue (non-permanent) thread locker
- Flashlight can be handy too.
- If you're going to be REALLY by the book about the job, it says to buy a new Torque Reaction bolt and new bolts to remount your right rear shock. The dealer here just kind of smirked at me and shook his head a little bit when I asked about it, so...wire brush and reuse it is.
Original thread with Removal video and all associated conversation:
Rear wheel removal video walkthrough


