Rizoma Club led indicator install (w/pics)

Do you know what size resistor was needed to make your Rizomas work?
When I did Rizoma IRIDE indicators on my Guzzi, they came with resistors for this purpose, just in case they are needed. Not sure of the values, but you shouldn’t need to source your own.
 
Rizoma indicators arrived today and I installed them in about 2 hours. I got the sequential ones. 4ea Rizoma Vision Sequential Turn Signal - RevZilla you will also need the pigtail adapters 2 ea Rizoma Turn Signal Cable Kit Triumph - RevZilla and the blocking plates 2ea Rizoma Front Turn Signal Adapters BMW / Triumph - RevZilla total from Revzilla was $390 USD
@smordue1 thank you for posting the links - that was very helpful. I've put in the Rizoma sequentials for the rear. For me they looked too small up front so I've put in the European version of the indicators up front. The euro factory indicator lens matches the look of the headlights quite a bit.

It's slightly mismatched front to back but works for me. For the rears I did not use the blocking plates on the stock rear indicator mount. I had to use a cap screw and nut to hold the metal clip in place that keeps the tail screwed on. Also it was quite crowed, so I had to cut out/solder to shorten the indicator wires.

I was surprised though how cheaply made the Euro spec Triump signals are. Injection molded plastic and the mold parting lines are crazy bad/obvious. I'll have to keep an eye out to see if something nicer can replace them.
 

Attachments

  • IMG_1380.jpeg
    IMG_1380.jpeg
    317.2 KB · Views: 55
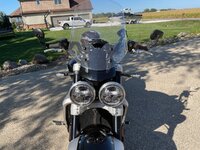
Merry Christmas, everyone!

Wanted to share this led project on my '21 R3R with anyone interested in swapping out the giant indicators (US market). It's a very straight forward job, and with the right parts, it's 100% plug n play. I shared some of these pictures on the Facebook page, and I've seen interest in the past on there as to what resistors should be used to keep the bike happy. Here's a rundown on what I purchased:

-Rizoma Club led indicators (each one comes with 2 resistors)
-Rizoma pigtail electrical wire adaptors
-Motogadget stem adaptors

I've toyed with a few different led indicator setups on my last Thruxton R, and Rizoma always provide such a top quality piece, so Rizoma was a no-brainer. The tricky part is always figuring out how many resistors need to be installed inline, or if any at all. I approached this project like I did on my Thruxton R (almost certain it's a CANBUS system like the 20/21 Rocket). I'll give a brief overview and insert some pictures for reference.

On my Thruxton, I had two resistors installed on the front (one per side), but none out back. This nailed down any blinkers issues on that bike, and did the same on the Rocket. Thankfully there is tons of room under the front fly screen to take on more hardware and wires. The rear is a bit tricky if you still have the factory mud guard/plate setup. I was able to tuck the full length of wire from the Rizoma setup, but opted out the use of the resistors. Sure enough, it worked. Turn signals work as they should and so do the hazards (no fast blinker). Obviously, every make of led indicator may come with different results, but figured this could give most a ballpark idea of what you're getting into and what things look like once opened up (especially the rat's nest in the front). For their size, the Club is a VERY bright and noticeable indicator. Strongly recommend them.

Let me know if there are any questions! On to some random pictures;

IMG_4627.jpg

IMG_4628.jpg

IMG_4629.jpg

IMG_4631.jpg

IMG_4632.jpg

IMG_4633.jpg

IMG_4635.jpg

IMG_4638.jpg

IMG_4641.jpg

IMG_4648.jpg
Hey that looks great! I would love the club signals on mine. Would you mind linking your exact parts for me?? Any help would be appreciated
 
@smordue1 thank you for posting the links - that was very helpful. I've put in the Rizoma sequentials for the rear. For me they looked too small up front so I've put in the European version of the indicators up front. The euro factory indicator lens matches the look of the headlights quite a bit.

It's slightly mismatched front to back but works for me. For the rears I did not use the blocking plates on the stock rear indicator mount. I had to use a cap screw and nut to hold the metal clip in place that keeps the tail screwed on. Also it was quite crowed, so I had to cut out/solder to shorten the indicator wires.

I was surprised though how cheaply made the Euro spec Triump signals are. Injection molded plastic and the mold parting lines are crazy bad/obvious. I'll have to keep an eye out to see if something nicer can replace them.
 
Back
Top