Mhboldt
.040 Over
Fellow Captains,
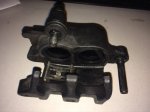
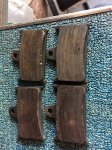
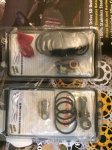
I've recently replaced my front brake pads, using the EBC HH pads. Part#FA236HH. Rears are FA209/2HH.
I watched videos and read instructions, and most of them had the calipers off the bike. I did the work without removing the caliper, and wanted to check my work with you guys here.
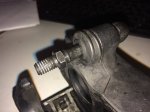
1. Use needle nose pliers, unfold and remove the cotter pin at the end of the pin holding the spring and brake pads in place.
2. Use a 5mm Alen key to remove the pin, holding the spring in place while you do.
3. Use the pliers to spread the pads out, opening up the pistons on each side of the caliper.
4. Pull the pads out, replace with new pads.
5. Put the spring back on top of the pads. I used the pin in the front and the Alen key in back to hold the pads in place. Theres probably a better method, but I'm lazy and those tools were there.
6. Copper lube on the pin and blue loctite on the threads of the pin. Replace the pin.
7. Replace the cotter pin, with new if needed.
8. Repeat on the other side.
9. Optionally, I also replaced the bleed screws with Speed Bleeders Part# SB8125L, I like those and the stock rear bleed screw allowed air in.
10. Optionally, I bled the brakes at this point using DOT 5.1, I do it every two years.
11. Apply the front brake repeatedly to seat the pistons into the pads.
12. Follow the instructions for your pads to bed them in.
Rears were very similar.
1. Use needle nose pliers, remove the pins at the end and middle of the retaining pin holding the brake pads in place.
2. Push the retaining pin through the back of the caliper, towards the wheel to remove it from the caliper.
3. Use a clamp to squeeze the front of the caliper (facing out) and the inboard pad. I was lucky that my c-clamp fit in this awkward spot.
4. Pull the pads out, replace with new pads.
5. I used an Alen wrench in the front to hold the pads in place.
6. Copper lube on the retaining pin. Replace the retaining pin.
7. Replace the two pins, with new if needed.
8. Do not repeat on the other side. there's nothing there...
9. Optionally, I also replaced the bleed screw with Speed Bleeder Part# SB8125L, I like those and the stock rear bleed screw allowed air in.
10. Optionally, I bled the brake at this point using DOT 5.1, I do it every two years.
11. Apply the rear brake repeatedly to seat the pistons into the pads.
12. Follow the instructions for your pads to bed them in.

