Soggy , sloppy, barely working Front Brake fix

tribal

Moto Hobo Gypsy Vagabond
Joined
Apr 15, 2006
Messages
889
Location
North America - presently touring the USA
Ride
2005 Rocket III & 2015 Rocket III Roadster
This may a "no $hit" fix or repeat post but here goes:

Issue: Front brakes on 2005 R3 are barely working. Lever pulls in almost to the grip.

1st thing tried = replace brake fluid and bleed - helped a bit but not much
2nd thing = replace both sets of pads - helped a bit but not much

After 2+ years of inadequate braking I decided to attempt another fix before my upcoming
October winter escape run.

I went to put on new pads but they were fine and only slightly worn. Hmm, time for a new plan.

3rd thing = remove all pads and squeeze the front brake lever until all caliper pistons fully extend.
Ah ha, most do not!
4th thing = spray brake cleaner around pistons and gently free them without damaging them.
Once they are out, lube each one up with a good grease.
Push them in manually and repeat brake squeeze/lube until they all work as intended.
5th thing = lightly sand both sides of both rotors - also check for warping and float/free-play operation.
6th thing = replace both sets of pads and squeeze brake until both sides engage the rotor.

7th thing = Use a zip tie or rope to hold the brake lever fully engaged tightly to the grip.
Leave it overnight. This will compress the remaining air bubbles in the fluid and force them
out the calipers. Air in the lines is your enemy.
Remove the zip tie and (hopefully) enjoy your properly functioning front brakes.

This worked like magic and my brakes are now working almost as good as new...

If this doesn't work then the brake lines and/or calipers and/or rotors probably need replacing.
 
Great reminder. Gotta keep those pistons lubed and make sure to replace the brake fluid regularly (per service interval, every 24 months) so it doesn't gum up the lines.
 
Try new seals. If that don't work, try rebuilding the master cylinder. I replaced seals in the back because the pads were sticking. The figured, whatehek do the front and the whatatheck do the valkye too. Then saw some cheapo EBC rotors and whataheck slapped those on too.

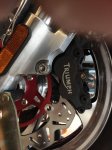
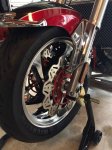
IMG_0678 (1).JPG IMG_0677 (1).JPG

They key to this repair is cleanliness. Zero contamination of the rotor or pad with grease or brake fluid!

If you don't want to replace the seals, break the caliper bolts before removing from the bike unless you have a vice on your work bench like Turbo does. Remove the calipers and wash thoroughly before disassembly. Take the pistons off completely with 15 to 20 psi compressed air. Clean and polish the pistons with brake fluid only. Clean caliper with brake cleaner spray, Qtips and tooth pick. You can take the seals out to clean and re-lube. Must go back in identical orientation! No scratching the interior of the caliper with anything to clean it. There are these minuscule holes between the piston chambers. Make sure they are patent. Lubricate seals with Brembo brake assembly grease (or the like). Seat pistons all the way down. Install the pads. Next step is to mount the calipers on the bike. Don't damage the leading edges of the pads.

I drain old fluid from the lines. Do not drop dirt into the fluid reservoir (crystals and junk that forms there) Install speed-bleeders on the calipers. Use only a fresh DOT4 bottle to refill. Found and old large 20CC syringe the generate a vacuum at the caliper using a short piece of clear tubing as a pig tail. Slowly suck the air out. Refill the reservoir often. When fluid comes out the bottom, do the other side. Try and see if you have pressure. You have to seat the pistons so it takes a lot. Replace the cover and your ready to go slow until you are sure you have pressure.

If after all this you have no brakes...:thumbsdown: Can't imagine an aneurysmal brake line expanding and create this problem. Only air in the system will cause this problem. or a bad master cylinder.

Remember that it takes 3 to 500 miles to set a set of pads. Tried to find my original post with pics but could not find it.
 
The thread is Brake Piston Insert. Video and all.

There are some important tips that can be viewed in a YouTube on the same subject. Ill try to find it.

1. Loosen everything before taking the caliper off the bike. Unless you have a good vice. The rear caliper on the R3 is a "one piece, not one your split open.
2. Prepare to hang the brake line somewhere safe where the leaking brake fluid will not get on the paint.
3. Take the pads off and force the pistons out. If one refuses, block the other and press the stubborn one out.
4. If you are going to use compressed air, block the pistons from flying out with a small piece of wood or an old pad.
5. Have an old open bottle of DOT4 to use as cleaner.
6. Prepare your table with a clean towel like you do for your guns.
7. In case your only have a lip to grab to pull a cylinder have a set of vice grips and a protective piece of rubber to grab the piston. No scratching anything OK?
8. Use only a clean no lint towel to clean the pistons. A non-metal scrub is OK but no metal please. DOT4 as cleaner. Soak the stubborn one overnight.
9. If you have an ultrasound tub, DOT4 container with caliper is best. No acid!
10. No US, soft old tooth brush and DOT.
11. Pick the old seals out with a toothpick. No screwdrivers!
12. Q Tips to clean the groves where the seals were.
13. Give the exterior a serious clean with DOT and a hard brush.
14. With gloves on, spray clean the caliper with Brake Cleaner and compressed air.
15. Place all your new parts on the bench and determine with seals go where. The usually are of two different sizes.
16. Lightly grease the seals and groves with the red grease that comes in the kit. Otherwise clear assembly grease will work. Very light on the grease.
17. The outside of the seal is flat. The piston side of the seal is not. Correct positioning of the seals is critical. The previously mentioned video explains how.
18. Insert the seals and insert the piston into the caliper, all the way in.
19. Install your new Speed Bleeder and connect the brake line. Reassemble the axle/caliper/tyre.
20. New pads please. Clean the rotors with brake cleaner. Do not contaminate the disc or the pads with your greasy hands. When you open the brake reservoir do not contaminate it. There is corrosion stuff sitting on the edge ready to fall in. Be ready to get it. Clean the cover and diaphragm well.
21. Bleeding your brake line procedure varies. New bottle of DOT4 please. Some push fluid from the caliper to the reservoir. Some apply a vacuum and suck the fluid from the reservoir. I just exercised the master cylinder adding fluid as it went in. It took a while. I used my Sonicare tooth brush to vibrate bubbles out. Tapping the lines works. It took forever. Called Scott to see if I had messed up. The vacuum pump is on my shop list.
20. When you feel pressure tighten the bleeder, replace the reservoir cap and you can go have a beer.
21. Follow the pad seating procedure, whatever you like or the box say. Start with long slow braking. The say 300 miles, the spend a week in Maggie Valley.

Be sure your seals are inserted correctly. Don't let the brake fluid get on your paint. Don't contaminate the discs or pads! Don't scratch the piston or interior of the caliper. Treat the process like your cleaning a gun. Brembo stopped selling seal kits because folks were putting the seals in wrong, got in a crash and sued Brembo.

Like Sonny say, "Enjoy the upgrade" I think I enjoy working on my TwoTone as much as he does on his X
 
I hadn't seen 1K9's extensive tear-down process and just did an abridged Readers Digest version
without removing the calipers.

It's been a long time since they worked well but subjectively they are close to "like new" and are
good enough. I do a lot of engine breaking.

If they go south again and I'm bored I may do the in-depth steps above and would probably upgrade the front & rear
brake lines.

I read elsewhere that some people are putting newer Roadster calipers on the originals as well. Apparently the pistons on 2007 and greater (?) are coated and are not as prone to sticking.

Some mumbling about swapping the master cylinder for a Roadster version as well.
 
Back
Top