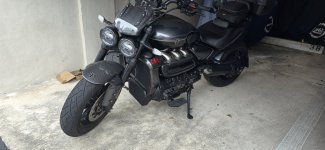
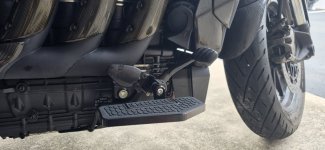
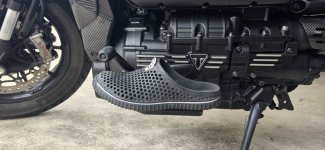
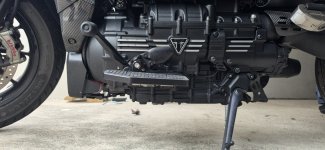
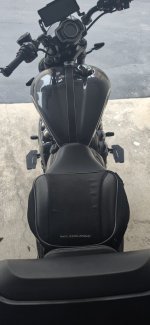
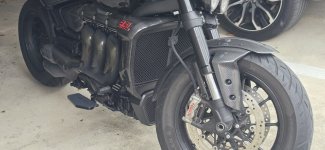
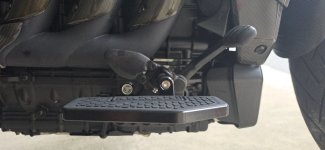
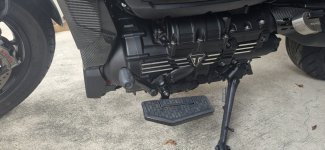
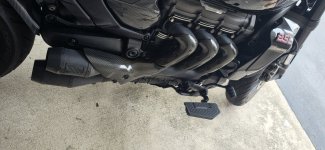
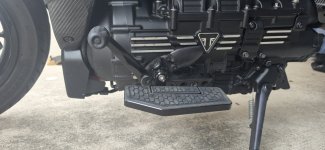
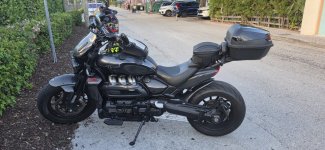
Floorboards - attempt to have floorboards on the Rocket 3 GT from the available parts made for other motorcycles

A1A Rider

Go big and go broke
Joined
Dec 26, 2024
Messages
357
Ride
Rocket 3 Storm GT 2025
Used about $200 to buy Chinese floorboards to get parts from to get this setup.
 

Attachments

  • aD6Ujt0.jpeg
    aD6Ujt0.jpeg
    154.1 KB · Views: 41
  • ROJzsVA.jpeg
    ROJzsVA.jpeg
    101.8 KB · Views: 39
  • r2vmH5h.jpeg
    r2vmH5h.jpeg
    123.6 KB · Views: 39
  • R2v1Vx3.jpeg
    R2v1Vx3.jpeg
    122.6 KB · Views: 37
  • QynoWxq.jpeg
    QynoWxq.jpeg
    87.1 KB · Views: 36
  • OeyIPZ9.jpeg
    OeyIPZ9.jpeg
    128.8 KB · Views: 38
  • IVCJ56q.jpeg
    IVCJ56q.jpeg
    79.6 KB · Views: 35
  • fpWj0IO.jpeg
    fpWj0IO.jpeg
    138.4 KB · Views: 39
  • FA1DPVa.jpeg
    FA1DPVa.jpeg
    157.5 KB · Views: 38
  • v8iVupZ.jpeg
    v8iVupZ.jpeg
    107.3 KB · Views: 36
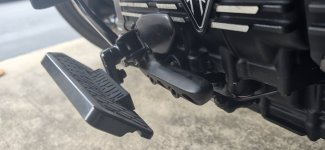
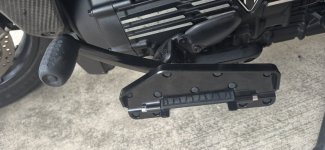
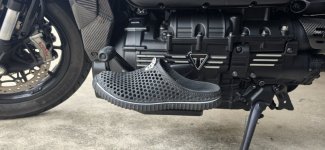
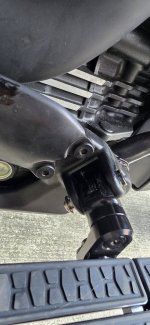
Notice how the floorboards have 2 ways to "collapse". First is the retained original movement in the arm. Second, the choice of floorboards that have their own hinge too. So, 2 safe ways to give in when turning hard.
 

Attachments

  • TM1Ovh3.jpeg
    TM1Ovh3.jpeg
    76.2 KB · Views: 30
  • CqlW28w.jpeg
    CqlW28w.jpeg
    112.1 KB · Views: 27
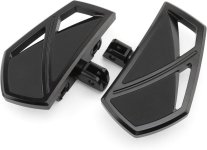
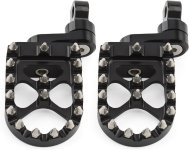
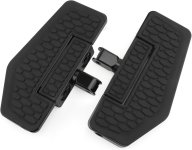
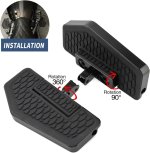
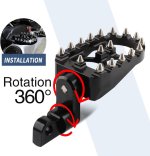
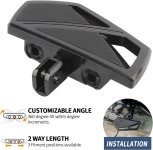
These are Chinese parts that were donors. You can also find these a-plenty on AliExpress, no need to use Amazon. I generally buy from Ali myself but I found that Amazon that ships sooner had comparable pricing to Ali, so I went with these on Amazon.

Main floorboards with discarded connector: https://www.amazon.com/dp/B0DZX6VBFN

Bought these only because of the connector, couldn't find any other way: https://www.amazon.com/dp/B0F53P4MQB

This is the the middle "extension" that allows to position floorboards lower (to allow the boot to go under the speed selection lever): https://www.amazon.com/dp/B0DXKK6CQP

These 3 products are of the same "system" and fully interchangeable in parts. Thus, not "close enough" or adjustment, etc, they fit like a glove.
 

Attachments

  • 61jDO-6hiAL._AC_SL1500_.jpg
    61jDO-6hiAL._AC_SL1500_.jpg
    91.1 KB · Views: 16
  • 61UuzKh5iML._AC_SL1500_.jpg
    61UuzKh5iML._AC_SL1500_.jpg
    106.8 KB · Views: 18
  • 61Q61qvHQ0L._AC_SL1500_.jpg
    61Q61qvHQ0L._AC_SL1500_.jpg
    83.8 KB · Views: 17
  • 71PWMW-PG-L._AC_SL1500_.jpg
    71PWMW-PG-L._AC_SL1500_.jpg
    124.4 KB · Views: 19
  • 615YPyZh45L._AC_SL1500_.jpg
    615YPyZh45L._AC_SL1500_.jpg
    105.8 KB · Views: 15
  • 714ziPkJcQL._AC_SL1500_.jpg
    714ziPkJcQL._AC_SL1500_.jpg
    137.2 KB · Views: 19
Last edited:
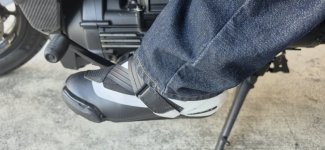
Before my biggest hurdle was how to lower the floorboards, as without any sort of lowering the boot would not safely fit under the speed selecting lever.

I know I used a wrong shoe type for the pic, the only one I had handy at the time of taking pics. But as you can see, the clearance seems to be good enough (pictured shoe is US size 11).
 

Attachments

  • r2vmH5h.jpeg
    r2vmH5h.jpeg
    123.6 KB · Views: 17
Last edited:
Installation:

Had to make these changes:

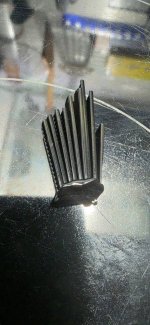
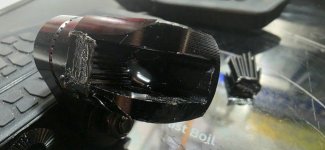
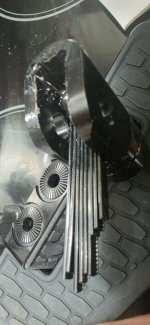
1) As I said originally, the connector (one that goes in where your original pegs connected to the bike) is 99% like you need. I had to shave about 1mm, maybe 0.9mm. I used a belt sander, about 5mins each. You can get away with a file. Main thing, don't take off more than needed, so, check for fitment often. It is utmost important to take off minimal amount. Don't take from both sides, take only from the bottom facing side, keep the top one good looking and untouched. Also, even then you might think it barely fits but still a lot of play, once you'll add the spring, that slop you feel will go away.

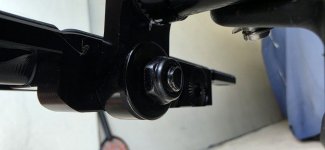
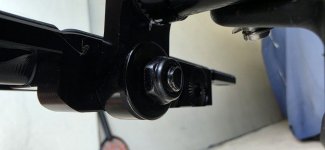
2) Change out to my own 30mm long, 8mm wide bolt, add compression ring, flat washer, and a metal nut with a nylon lock ring. So, the proper order, 8mm bolt head (30mm long), 8mm compression ring, floorboards, the extension, the 8mm washer (wide), the 8mm nut with a nylon locking ring. See pic. This is a must in my opinion to keep the floorboards well put together. Another top bolt that goes through the extension into the connector, I put on orange thread locker, let it cure overnight.

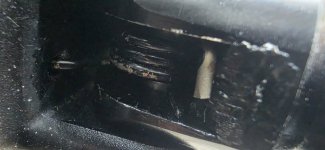
3) Noticed the middle groove is longer than on the original pegs about 5mm deeper. Issue is when you try to install, the round spring can't find "backing" and doesn't work. Not to overthink, I cut 5mm zip ties, added them back to back, glued on hot glue, then used a hot knife to take off the top. It is not a load bearing part, so, worked out well enough and very quick. But you do you.

Overall, the whole modification for all 2 floorboards took about an hour.
 

Attachments

  • DrF6QCF.jpeg
    DrF6QCF.jpeg
    88.9 KB · Views: 23
  • lxKGPvT.jpeg
    lxKGPvT.jpeg
    164.4 KB · Views: 22
  • JJMXoaA.jpeg
    JJMXoaA.jpeg
    86.6 KB · Views: 25
  • f70HsfP.jpeg
    f70HsfP.jpeg
    111 KB · Views: 25
  • qHUuY62.jpeg
    qHUuY62.jpeg
    58 KB · Views: 24
  • mSVv054.jpeg
    mSVv054.jpeg
    124.8 KB · Views: 22
Last edited:
Now, how was it, the first ride?

Loved it. First 30mins was a bit odd. But then, nirvana. Was a bit louder than usual, as my knees were screaming the whole 4 hour ride: "Thank you, thank you, thank you!"

Seriously, the range of knee angle is outstanding. You can even use it as full highway pegs, as you can stretch legs fully (I am 6 feet tall). As I was riding, I was changing leg position and it was a feeling of freedom. Loved it. So happy I was able to get it together.

I wanted floorboards a long time ago, just when I bought the bike. I even listed it as one of the deficiencies of this bike when I just bought it on this forum. People laughed at me, but I'm like, "We all use our bikes differently." I just let it go.

I want to say this was a financial risk, but I waited to find the parts for a long time. I have flow boards from other motorcycles, and I tried to foresee what could be done here. The problem was that the flow boards without the lowering adapter were just too high. The only way to do that was to cut the speed selector and extend it, and I just wasn't ready for that yet. All of a sudden, I found that there is a set of Chinese flow boards that can work together and come to a solution. It took me maybe three months to continue looking at the items, comparing them, and reading about them. At some point, I was fairly certain it would work. $200 was a little outside my financial capability, but I really wanted the flow boards. As long as I was reviewing these items over and over again, it looked like it would work. Therefore, it wasn't just a quick decision. It was a few months of thinking about what would work and what would not. Strangely, I just worried about the parts that I was looking for.

As I was writing, I was thinking that I don't really think there was anything about these flow boards that I would say can be attributed to... well, it is what it is. I liked everything about them. They're very rubbery, so they grip the road very well, even if it rains. It's not one of those fancy metal ones where the feet will not get good traction. Here, it's all rubber, and the traction is outstanding. And you need traction for forward controls. Another thing: I don't feel like there is anything unsafe about them. They're very well constructed. I added a few compression rings and nuts, and all together it just feels like it's a good fit. Therefore, I don't have anything with this project to say something is still outstanding. Everything fits well and looks good. Even the flow boards, the speed selector, and the brake all come together very nicely, as if it was the same set. Therefore, construction-wise, putting it together, how it looks, I'm satisfied in all regards.

Yes, probably the first 30 minutes was a bit odd getting used to floorboards again because there is no definite place where your leg position should be. But you get used to things, and basically in 45 minutes it just starts to feel right. And after a few hours, you're just thinking where it had been before. It's just so right, so true to how it should feel. It's just an unbelievable feeling. Your legs have freedom they didn't have before. The knees, specifically for tall people, are outstanding. The angle and everything is perfect. You can change it throughout the ride, stretch it, and bring it back. It's an unbelievable experience, and now I can have it for each ride.

Overall, I recommend.

 

Attachments

  • fww38Dl.jpeg
    fww38Dl.jpeg
    134.6 KB · Views: 32
  • wW0nuXf.jpeg
    wW0nuXf.jpeg
    202.6 KB · Views: 30
Nicely done and great writeup. I'm tempted to give it a try. Have my Ducati for canyon carving, so I don't really scrape any pegs with the Rocket. Have to admit I like Floor boards on the Harleys I've ridden.

Question: Why didn't you just bolt the lowering bracket directly to the rubber floorboards? With the hinge already on the board, wouldn't that work? Skip the second set of boards entirely?
 
Last edited:
Question: Why didn't you just bolt the lowering bracket directly to the rubber floorboards? With the hinge already on the board, wouldn't that work? Skip the second set of boards entirely?

Can you be more specific? The lowering bracket is bolted directly to the floorboards.
 

Attachments

  • qHUuY62.jpeg
    qHUuY62.jpeg
    58 KB · Views: 15
Back
Top