

3VEL 1
Standard Bore
Hello Rocketeers,
Yesterday I removed the backrest and installed the Lamonster Tail Tidy on my 2025 Evel Knievel GT. I'm super happy with the results, and thought i would share some tips and pictures for others who may be interested in doing a similar mod.
First, the backrest removal was mostly straightforward, but I can still share a tip or two.
I had already installed a Corbin Gunfighter saddle. You can find this here:
 www.corbin.com
I had a Corbin seat on my first Rocket, a 2007 Classic model. It was a huge improvement in comfort from the stock seat back then.
www.corbin.com
I had a Corbin seat on my first Rocket, a 2007 Classic model. It was a huge improvement in comfort from the stock seat back then.
This new seat wasn't as big of an improvement in comfort, mostly because the stock seat is quite good. I do like the look of the single seater, and I am happy with the color match between the Corbin Navy Leather with red stitching and the Evel Knievel paint scheme.
Removing the backrest was the last step, and I was waiting for the parts to arrive.
Here are the parts needed:
NOTE: The finisher part numbers shown here are for Black infills. If you want silver, you will order different part numbers. Also, the infills cost about $150 each. Expect to pay around $350 to do this.
Installation is relatively easy. You need to remove the under-tail cover, which may be tricky if you don't know how it comes off. There are 2 screws under the seat, and then the panel slides forward to release.
Once removed, the backrest comes off easily, with the removal of 2 screws on top and 4 screws from underneath. These screws on top are re-used, and the screws underneath are not re-used.
You need to attach the plastic finisher pieces to the infill panels before installing. Use the 4 screws for this. Once attached, the new infills slide from the front to the back to lock-in to the tail of the bike, and then you secure them using the 2 re-used screws. Easy-peasy.
Installing the Lamonster tail tidy is quite a bit more involved, and there are no instructions provided. You can purchase this tail tidy here:

 www.lamonstergarage.com
I chose the version that includes new turn signals and license plate lights.
I referenced the instructions provided in the "Resources" section of this forum for installing the Evotech tail tidy. These were super helpful. I chose the Lamonster product instead of the Evotech because I like how tightly it places the license plate near the brake light, rather than sticking out.
You need to drill 4 holes in the under-tail panel to fix the bracket, and 1 more hole to pass the wires through. Take your time to ensure the bracket is centered and is positioned where you want it fore and aft, as there is some flexibility here. Pro tip: For the wire pass-through, purchase a grommet to keep your wires from chafing on the hard plastic of the panel, and to minimize water intrusion into the tail area. Also, I recommend positioning this pass-through hole on the left side of the bike, next to the bracket, not in the center. There are a lot of wires (turn signals, license plate lights), and the under-seat toolbox is in the center, limiting room for the wiring.
You may also want to purchase some finishing washers for reinstalling the bolts for the stock license plate bracket. I used these:
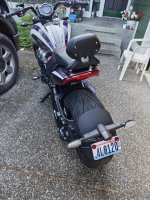
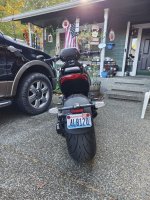
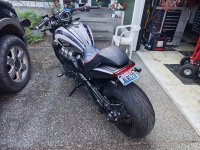
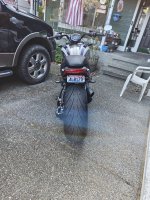
Okay here are the pictures, with some before and after for comparison.
Yesterday I removed the backrest and installed the Lamonster Tail Tidy on my 2025 Evel Knievel GT. I'm super happy with the results, and thought i would share some tips and pictures for others who may be interested in doing a similar mod.
First, the backrest removal was mostly straightforward, but I can still share a tip or two.
I had already installed a Corbin Gunfighter saddle. You can find this here:
Corbin Motorcycle Seats & Accessories | Rocket 3 Gunfighter Saddle | 800-538-7035
Corbin Motorcycle Seats, Saddles, and Accessories Online
www.corbin.com
This new seat wasn't as big of an improvement in comfort, mostly because the stock seat is quite good. I do like the look of the single seater, and I am happy with the color match between the Corbin Navy Leather with red stitching and the Evel Knievel paint scheme.
Removing the backrest was the last step, and I was waiting for the parts to arrive.
Here are the parts needed:
| Finisher, Mudguard, Black RH | T2314807 |
| Finisher, Mudguard, Black, LH | T2314806 |
| Finisher, Bracket, RH | T2313131 |
| Finisher, Bracket, LH | T2313130 |
| Screw, BUT HD, M4 X 8, ENC | T3330343, QTY 4 |
NOTE: The finisher part numbers shown here are for Black infills. If you want silver, you will order different part numbers. Also, the infills cost about $150 each. Expect to pay around $350 to do this.
Installation is relatively easy. You need to remove the under-tail cover, which may be tricky if you don't know how it comes off. There are 2 screws under the seat, and then the panel slides forward to release.
Once removed, the backrest comes off easily, with the removal of 2 screws on top and 4 screws from underneath. These screws on top are re-used, and the screws underneath are not re-used.
You need to attach the plastic finisher pieces to the infill panels before installing. Use the 4 screws for this. Once attached, the new infills slide from the front to the back to lock-in to the tail of the bike, and then you secure them using the 2 re-used screws. Easy-peasy.
Installing the Lamonster tail tidy is quite a bit more involved, and there are no instructions provided. You can purchase this tail tidy here:
Triumph Rocket 3 License Plate Bracket / Tail Tidy 2020+
Clean up the rear of your 2020+ Triumph Rocket 3 with the Lamonster license plate bracket / tail tidy. Laser-cut 10ga steel, CNC formed, black powder coated, with hardware included.
I chose the version that includes new turn signals and license plate lights.
I referenced the instructions provided in the "Resources" section of this forum for installing the Evotech tail tidy. These were super helpful. I chose the Lamonster product instead of the Evotech because I like how tightly it places the license plate near the brake light, rather than sticking out.
You need to drill 4 holes in the under-tail panel to fix the bracket, and 1 more hole to pass the wires through. Take your time to ensure the bracket is centered and is positioned where you want it fore and aft, as there is some flexibility here. Pro tip: For the wire pass-through, purchase a grommet to keep your wires from chafing on the hard plastic of the panel, and to minimize water intrusion into the tail area. Also, I recommend positioning this pass-through hole on the left side of the bike, next to the bracket, not in the center. There are a lot of wires (turn signals, license plate lights), and the under-seat toolbox is in the center, limiting room for the wiring.
You may also want to purchase some finishing washers for reinstalling the bolts for the stock license plate bracket. I used these:
Okay here are the pictures, with some before and after for comparison.