Deano RT
Standard Bore
Hi all,
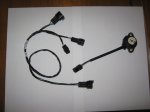
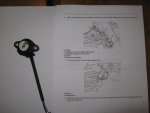
With reference to my Rocket Touring 2012, has anyone had to replace the gear position sensor with the new (and supposedly) enhanced wiring harness? The replacement sensor comes with a new wiring set up and it is no longer a simple job of replacing old for new. The new sensor has a much shorter lead and requires a new three way wiring harness. I have the new Triumph recommended wiring harness but the suggested replacement process includes removing the airbox to access the connections. Removing the airbox, according to the repair manual, is almost a complete rear end dismantle. If the new sensor had the same length lead I could replace it in minutes. Any tips?
Dean