Mounting the PCV & A/T on Roadster

motolink

Nitrous
Joined
Sep 11, 2010
Messages
1,431
Location
Brisbane South, Australia
Ride
2011 Roadster and 2001 Bonneville
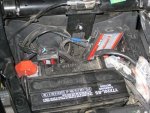
Any of the Roadster owners have photos of where their PCV & A/T are mounted.

Also where did you pick up the positive power for the A/T.

Looking at the fitting instruction they appear to be for earlier models not the Roadster, not much difference except the ECU is mounted with main connections on the top not the front side.

The instruction with the PCV do not mention the plugging into the sensor on the air intake, I connected into it , I guess that was the right thing to do seeing the plugs are parts of the PCV harness.

Slowly getting there.
 
I have mine (joined together with the valcro supplied) in the void between the battery and the rear fender. Will take a photo later.
Its fairly straight forward to fit both units. Instructions are on the PC website if you need.
As to the connections for A/T got one on the battery negative and the positive on the rear light supply (yellow cable)this is also mentioned on the PCV installation instructions bottom of the 5th page. (12v source for Auto tune - YELLOW wire of tail light connector located near ECU)
 
Motolink,
I hooked all wires up per directions and placed both units under the seat. Couldn't have done all the computer stuff without the help of GURU Hanso.

Went downstairs and took a photo. I lifted the units upward some for clarity. Never tried to attach a photo before - hope this works.
1olbull

WOW! that photo attachment was straight forward and easy!
Sorry about the dirt - neglected to clean it up after last ride.

I also used these three files:
 

Attachments

  • PCV-&-AT.jpg
    PCV-&-AT.jpg
    138.7 KB · Views: 144
You are right about Hanso, I have been on the phone to him, I quickly learned the fitting instructions that came with the kit were incomplete. I went onto the PC web site and found the complete ones.

Having a great deal of difficulty get to the plug under the plastic cover on the left hand side but I have plenty of beer to see me through.

Thanks for the feed back, I can see how it all fits now.
 
I have mine (joined together with the valcro supplied) in the void between the battery and the rear fender. Will take a photo later.
Its fairly starlight forward to fit both units. Instructions are on the PC website if you need.
As to the connections for A/T got one on the battery negative and the positive on the rear light supply (yellow cable)this is also mentioned on the PCV installation instructions bottom of the 5th page. (12v source for Auto tune - YELLOW wire of tail light connector located near ECU)

Thats where mine is mounted also
And mine Also it is the best spot I used the velcro supplied to join the two units together and it just sits there out of the way but easy to get to without removing any covers cept the seat
 
Evil,
Great minds thinking alike?
Especially remarkable when one is upside down!
heh heh heh :eek::D
1olbull
PS I just gotta get to OZ some day - you certainly have many fair dinkum larrikins I'd love to meet, ride and hit the turps with.
Any of ya on this forum ever come to northwest 'Merica I have an extra cruiser and I'd love to show ya a good time.
 
Finally have them mounted under the side cover or al least for now, just not sure if the Velcro will hold the units on the ECU bracket successfuly.
That plug on the left hand side under the plastic cover took some getting to, glad I am not paying some one to do this.
Now to put electrical grease on some of the connections and I should be ready run on a Hanso A/F table and test.
I found the velcro didnt want to stay on ECU bracket and it was just floating around under side cover :rolleyes: so I then moved it up in behind battery where it sit and dont move :) , I hope weather clears up so you can test it soon!:cool:
 
DId you guys remove the old O2 sensor all together or tape it up.

On my Roadster I would need to remove the bracket behind the ECU to get at the wiring if was to remove it completely.
 
Back
Top