mstraub72
.040 Over
- Joined
- Sep 5, 2017
- Messages
- 82
- Location
- Leduc, Alberta, Canada
- Ride
- 2015 Triumph Rocket 3 Roadster ABS, Black & Red
Good afternoon all! My '15 R3R has about 16k miles, and the stupid cam cover gasket has started sweating like a bunch of us have experienced I've discovered after using the Search tool. So, likely over my head, but feeling brave, I decided to tackle it. I've got the tank safely off, I've already done the RamAir install last year, so none of that annoying airbox system is in the way, and I've removed the pair of coils and that power the rear 6 plugs and set that aside. I'm at the point where I have a few questions, and I'd love some advice:
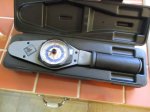
1) I could get the front two cam cover bolts out with a standard 5mm allen key, but I have zero idea how to get that torqued back up properly without taking that whole smozzle of wiring and the front coil entirely out of the way, so I can get a proper socket extension and the torque wrench on it. Is that something you have to do when you're doing this job, or do you guys just tend to hand tighten up those front two with the allen key? I started to undo that front coil from it's bracket, but it looks impossible to get out of there without taking all that other wiring out of the way too...
2) I've got all the cover bolts out, and the spark plug towers. The actual spark plugs are still in the head though...is that why I'm having such a hard time getting the cam cover to release? I doubt it, but something feels wrong. I know you're not supposed to jam a flathead screwdriver in there and start twisting or you'll scar up the mating faces, but man, I've gently tapped it with a rubber mallet, and pulled as hard as I can with what little grip surfaces you can find...no go. Felt like I'm overlooking something, so I cooled down and came in to type this up.
3) As I had the RamAir kit done already, it looks like I don't need to take the throttle bodies off...is this strongly recommended to do the job right? Looked a little daunting, so I just hoped it'd be okay to leave them where they sit.
4) Lastly, this one will likely be a debate. In my searching of the forums, I saw a few people say that you attach the new gasket to the cover itself, using little dots of crazy glue, and I've also heard that it was easier to let gravity help, and just attach it to the head itself using the same glue trick. Thoughts?
Thanks all!


