Just Installed A Tachometer On My R3T

When looking for a switched wire I used my taillight wire which is yellow. You will find that wire under the right side cover behind the ECU on the R3T. You will find the taillight/brakelight connector there. The harness isn't overly long so I separated the connector, removed some of the harness tape, strip some of the yellow wire insulation away an "soldered" a wire splice to the yellow wire. I taped the wiring back up and put the connector backed together. I have had no issues using that wire as a switched voltage source.

Oh yeah. Bedifferent always comes through!!
That's exactly what you advised when I installed my Tachometer and that's what I did, solder and all, so I guess that will be my "go to" switched wire from now on.:)
Thanks to @Bedifferent and @Joesmoe.
 
Oh yeah. Bedifferent always comes through!!
That's exactly what you advised when I installed my Tachometer and that's what I did, solder and all, so I guess that will be my "go to" switched wire from now on.:)
Thanks to @Bedifferent and @Joesmoe.

One more comment and an FYI. Now that I have the Amplink power distribution installed on my bike, I would probably be using that as my option for a "switched" power source. It should be noted that the Amplink cannot be used to provide the "constant" battery power to the tachometer. One wire of the tach "must" be connected directly to the battery for a permanent 12 volt supply as mentioned in the instructions. I tried using my Amplink to provide that power. but it completely screwed up the tach function. It would do a very slow sweep and then not read rpm's. It would also stick on some random rpm reading when I turned the key off. My thinking is... the Amplink has a few milliseconds of delay in providing power so the tach would not function properly without the constant voltage being available before the switching on power. As soon as I put the tach 12 volt constant supply wire back on the battery, my problem was solved. Most people don't have an amplink, but I mention all of this because you can't use the taillight power to provide both switching and the permanent 12 volt supply needed to make the tach work. They are two separate entities.
 
Last edited:
I know some of you R3T owners have talked about putting a tachometer on your bike. I've been looking and decided on the Koso BA035103 in chrome...It also comes in black. I spent most of the afternoon working on it, but I'm fussy. I used a Kuryakyn P-Clamp to get it mounted where I wanted it. I tied it into my center coil as it was the easiest to get to. A couple of adjustments and it seems to works fine from the get go. I'm posting this video. As you can see I didn't get it done till after dark. I'll post a few more shots tomorrow in the daylight after I get all the wires neatly dressed and everything buttoned up.

Well, I guess I can't post a video of it in action...I guess a picture or two will have to do for now.

[Add by @Joesmoe - with permission]

The tachometer has four wires, three in one group and one separate. The three 22ga wires are power-switched; power-unswitched, and ground. There is a long single wire, and this is for the pulse. I tied the switched wire into the position light that was in the headlight shell before the LED conversion. I ran a new wire for unswitched back to the auxiliary distribution panel under the seat between the rear fender and battery. The tachometer default count setting is one cylinder, and this is what works on the Rocket. Physically, the tachometer has two small buttons on the bottom, and if one looks closely with good eyes or a magnifying glass, one can see labels "SELECT" (left) and "ADJUST" (right). Having hooked up the sense wire (long blue) using the supplied pigtail (they call it "RPM Wire (Type B)") to the middle coil as described above, must be changed to "Lo". So there are three settings available on the tachometer, in this order: 1) Number of pistons; 2) Hi-Lo sense; 3) backlight brightness setting.
To enter the set mode, with power on the tachometer, push both buttons and hold for three seconds, and you will see the hand of the tachometer move to 500. This is the default setting of one spark for each two revolutions of the engine, and what works on the Rocket Touring. So leave that as is, and press the "SELECT" button once to change to the sense setting. Press the "ADJUST" button once. This should change from the default "Hi" to "Lo". You're done with settings, so push and hold the "SELECT" button to put the tachometer back into the operating mode.

If for some reason, the tachometer is still not reading, repeat the steps above.

Tach.jpg Tach 2.jpg
I like it, and all this time I just twist till she kinda gargles real bad then hit another gear till she gargles again, rinse repeat
 
That USED to be the case many moons ago, when the tach signal was being taken from the coil on a Distributor type system. So it would spark at a rate depending on the number of cylinders
Fast forward to present day, when most modern bikes and cars have individual independent coils for each cylinder.

Let's just take the coil for cylinder #1 - that receives a spark every 720 degrees or every two engine revolutions - most tachs are 4-stroke by default (ie fires every other engine revolution vs 2 stroke which is every 360 deg or every revolution - unless it has a wasted spark config where it also sparks at top of exhaust stroke, but don't worry about that)
Now that could be a single cylinder, twin, 3, 4, 6, 8, whatever, it is irrelevant; what matters is that SINGLE Coil sees a spark every other revolution - so the number of cylinders the bike has is completely moot and is not even factored into the settings.
(You would essentially be setting it like a single cylinder 4-stroke); i.e. the set-up for the R3 would be no different from the set-up for a metric 4-cylinder where the signal was also being sourced by a single coil drive.
On your triple, just because the ECU fires those other cylinder 240 deg, and 480 deg later within those two engine revolutions, the signal from coil 1 is oblivious to that and as far as the tach goes, it has no idea (nor cares) how many cylinders it really has.
( you don't HAVE to connect to coil #1, you can connect to any one of the three - again, the tach has no clue - or care - as to which it reads, just knows that every time it gets a pulse, that is 2 revolutions
WOW
 
My KOSO BA035113 tachometer just stopped working. The needle sweeps upon powering up. However, when the engine starts, it stays at zero. After about a minute, the needle moves to 8.000 RPM and stays there. It does not respond to the engine at all. Checked all the connections and they are good. The tachometer does not respond to pressing the two buttons on the bottom of the case. After 3 years and 20-25,000 miles, it appears to have died.

Went to the KOSO North America website and discovered the tach has been discontinued. Found one on eBay. Just passing the info along in case anyone is interested.
I just check on Amazon and they show 1 available with a black face. I also have a spare one that I removed from my 2013 when it got totaled. It has a white face and I assume it still works. I've considered buying the black face and swapping mine out for a change.
 
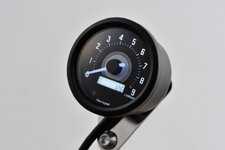
Has anyone heard of Daytona gauges? Ive particularly liked their 9K tach with shift light ( of hearing some collective opinion before ordering it..

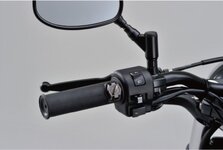
P.S. apologies for the offtop, but i also liked heated grips offered by daytona...looked very stylish and fitting to the overall rocket look ( very little-to-no mentions of this particular company..
 

Attachments

  • SmartSelect_20221205_223209_Chrome.jpg
    SmartSelect_20221205_223209_Chrome.jpg
    28.8 KB · Views: 13
  • SmartSelect_20221205_223231_Chrome.jpg
    SmartSelect_20221205_223231_Chrome.jpg
    35.9 KB · Views: 13
Back
Top