AussieMick
Living the Dream
Well I went and bought Easy Brackets for the Triumph Saddlebags a few weeks ago as I was sick to death of bolting them on for going to work during the week and unbolting them to look cool on the weekends. I took a few photos during installation and added a few words to them in case someone else was interested in the same.
Note: These instructions are issued as a guide only as your particular circumstances may vary. Always check, measure and mark twice prior to any drilling.
Step One: Install the provided hardware (Easy Bracket bolts) onto the motorcycle as described in the installation paperwork that came with the Easy Brackets. They look good.
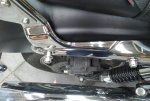
Step Two: Mark out the original saddlebag frame mounting holes (where the saddlebag frame mounts onto the motorcycle) onto the saddlebag. You can do this with a dark marker or a white correction pen
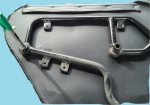
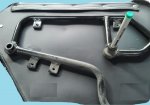
Step Three: Draw a straight line through the two marks made at Step Two. This will assist you in lining up where you want the Easy Brackets to sit. On this installation, the Easy Brackets mounting holes cannot go over the OEM saddle bag frame mounting holes as this would make the Easy Bracket go too far forward resulting in the front edge being over the front of the saddlebag. Move the Easy Bracket along your marked line so that the front edge of the Easy Bracket is within the edge seam of the saddlebag.
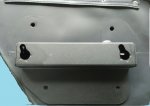
Step Four: Once you have the Easy Bracket aligned where you are happy, mark all four of the mounting holes with a dark marker or white correction pen. Caution; ensure you have aligned the Easy Brackets so the middle of the small part of the keyhole is directly over the line you marked. This is where the brackets are fixed to hardware on the bike (at Step One).
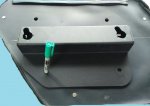
Step Five: Choose your drill bit according to the mounting hardware supplied (start a size smaller if you like as that will assist in keeping dust and water out – you can always enlarge if needed). Check all measurements and marks again and then drill your four Easy Bracket mounting holes. A sharp drill bit keeps the holes accurate and neat.
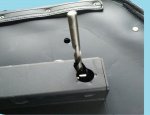
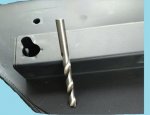
Step Six: Mount the Easy Brackets to your saddlebag using the supplied hardware and check the fit on the bike. If everything went to plan (and it should have), follow the same procedure above for the second saddlebag. The hardware supplied for mounting the easy brackets to the saddlebags is generic to fit all scenarios. You may want to mount the hardware so the head of the bolts are on the inside of the saddlebags. To do this; use large washers on the inside and smaller large washers on the outside of the saddlebag (original fitting shown on this photo). The supplied lock nuts are not suitable for the top fitting inside the key holes (they jam the lock). You will need to use normal nuts and a Locktite style product if you choose this method of mounting for the top bolts. You may find this method useful as you will then not have bolt protrusions inside the bag. The original fitting hardware used to fit the saddlebags to the OEM frames can now be re-inserted into the holes left in the saddlebags to fill them in. Again, you can orientate them anyway you like.
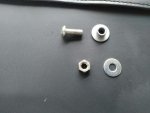
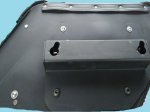
Last Step: If you did re-orientate the mounting hardware so bolt heads were inside and nuts outside the saddlebags you can exchange all hardware for black hardware or, cut a small hole in a piece of cardboard, place over the shiny nut and exposed bolt and spray with some Matt Black spray paint. Once mounted on the bike, no one will notice the difference and you will not have protrusions inside the bags.
Note: These instructions are issued as a guide only as your particular circumstances may vary. Always check, measure and mark twice prior to any drilling.
Step One: Install the provided hardware (Easy Bracket bolts) onto the motorcycle as described in the installation paperwork that came with the Easy Brackets. They look good.

Step Two: Mark out the original saddlebag frame mounting holes (where the saddlebag frame mounts onto the motorcycle) onto the saddlebag. You can do this with a dark marker or a white correction pen


Step Three: Draw a straight line through the two marks made at Step Two. This will assist you in lining up where you want the Easy Brackets to sit. On this installation, the Easy Brackets mounting holes cannot go over the OEM saddle bag frame mounting holes as this would make the Easy Bracket go too far forward resulting in the front edge being over the front of the saddlebag. Move the Easy Bracket along your marked line so that the front edge of the Easy Bracket is within the edge seam of the saddlebag.

Step Four: Once you have the Easy Bracket aligned where you are happy, mark all four of the mounting holes with a dark marker or white correction pen. Caution; ensure you have aligned the Easy Brackets so the middle of the small part of the keyhole is directly over the line you marked. This is where the brackets are fixed to hardware on the bike (at Step One).

Step Five: Choose your drill bit according to the mounting hardware supplied (start a size smaller if you like as that will assist in keeping dust and water out – you can always enlarge if needed). Check all measurements and marks again and then drill your four Easy Bracket mounting holes. A sharp drill bit keeps the holes accurate and neat.


Step Six: Mount the Easy Brackets to your saddlebag using the supplied hardware and check the fit on the bike. If everything went to plan (and it should have), follow the same procedure above for the second saddlebag. The hardware supplied for mounting the easy brackets to the saddlebags is generic to fit all scenarios. You may want to mount the hardware so the head of the bolts are on the inside of the saddlebags. To do this; use large washers on the inside and smaller large washers on the outside of the saddlebag (original fitting shown on this photo). The supplied lock nuts are not suitable for the top fitting inside the key holes (they jam the lock). You will need to use normal nuts and a Locktite style product if you choose this method of mounting for the top bolts. You may find this method useful as you will then not have bolt protrusions inside the bag. The original fitting hardware used to fit the saddlebags to the OEM frames can now be re-inserted into the holes left in the saddlebags to fill them in. Again, you can orientate them anyway you like.


Last Step: If you did re-orientate the mounting hardware so bolt heads were inside and nuts outside the saddlebags you can exchange all hardware for black hardware or, cut a small hole in a piece of cardboard, place over the shiny nut and exposed bolt and spray with some Matt Black spray paint. Once mounted on the bike, no one will notice the difference and you will not have protrusions inside the bags.
